|
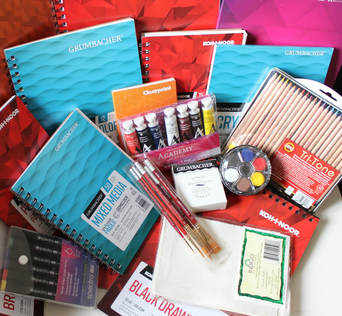
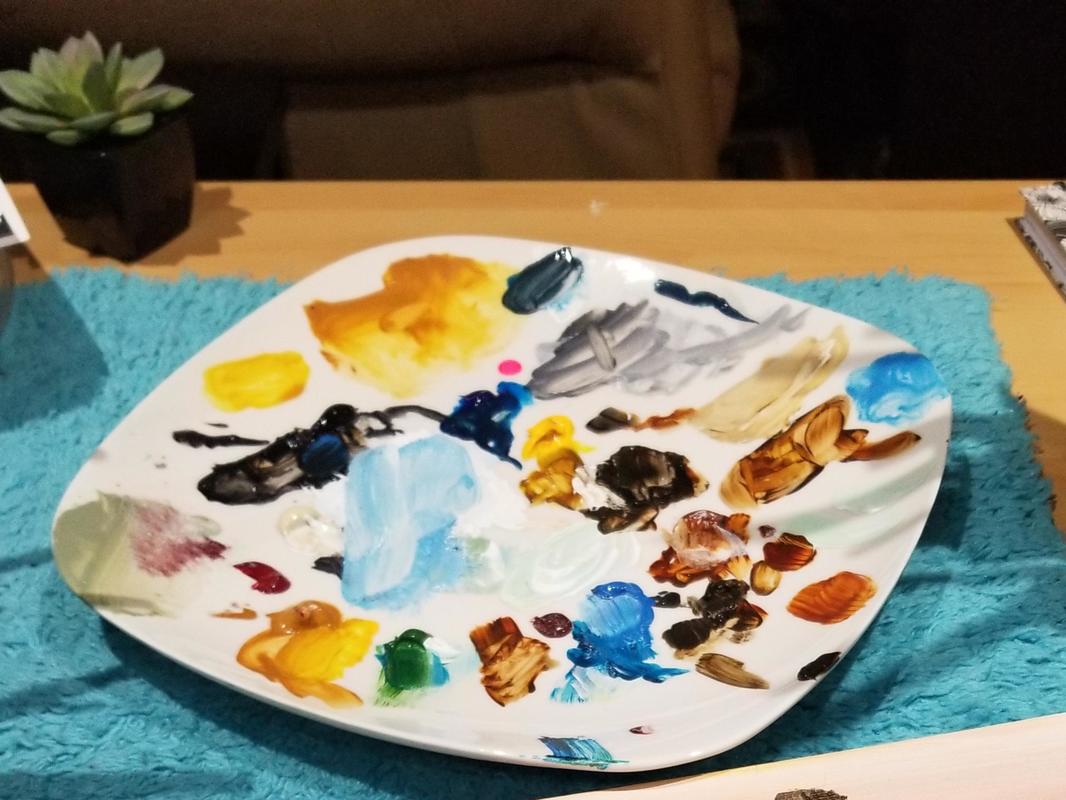
Hello Friends, and thank you for popping back in. I thought this would be a great topic for my first blog of 2019. One of my students who took one of my acrylic classes for the first time, asked me a great question “What would be required for a novice painter to supply themselves with on a budget?” This is a great question and to be honest l often get asked, so it made sense that l would write a blog about it. Now keep in mind that my suggestions are not written in stone and there is a vast variety of supplies that you can get. If you are on a budget and not sure if this is going to be a long term adventure, here is a list of my honest recommendations of acrylic painting supplies that you can start with. Remember that you don’t have to purchase all your supplies at once, as l tend to be frugal and enjoy a sale or a deal on the items l require, or want. Waiting for coupons or sales will help you get the most for your money. Here is a list of what l would start off with and where to find them. Brushes I like to use acrylic taklon brushes and ones that are made from synthetic fibres. Taklon brushes have very smooth bristles allowing for smooth acrylic paint application and l find them perfect for detail work. You do not need to grab top of the line brushes. Michaels sells some excellent value packs, in different sizes that are perfect to start with. Dollar stores sometimes also sell taklon brushes, l have purchased them myself and use them on a regular basis. Although there are so many different sizes and shapes used for all types of techniques, you don’t need a handful of brushes to start off with, you only need a few. In time you will develop preferences for sizes and shapes. Mop brushes are a must for my style of acrylic painting and they are used for blending your colours and to soften your brush strokes. You can find mop brushes at most art stores, l tend to look for a mop brush with the softest bristles. Make-up blush brushes work great as a mop brush for blending, so if you have one that you aren’t using, make sure it is clean and dry and you can start using it. 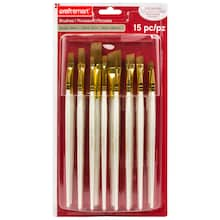 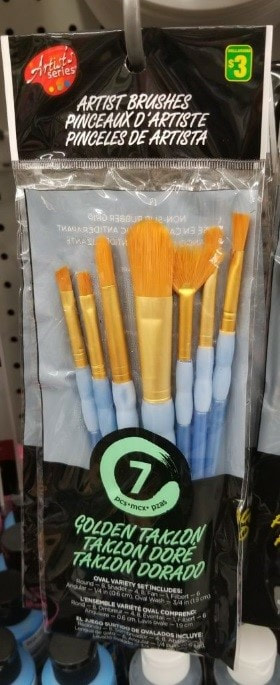 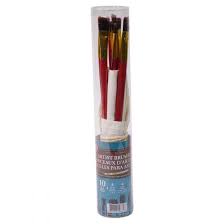 The following brushes are ones that l recommend you start with: #1 liner brush/rigger, for detailing. #4 and #8 filbert are versatile brushes, great for different brush strokes. Medium size mop brush/blush brush, which assists in blending your colours and softening your brush strokes. #12 Flat brush for applying paint to your backgrounds and larger areas. 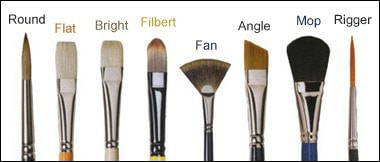 Palette You will require a palette on which to mix your paints. This can be made of plastic, non-porous surfaces are highly preferred. Disposable foam plates work great and make clean up easy. Most art stores sell a variety of wonderful pallets even ones with lids to store unused paint. Don't forget to visit your local Dollar store, they may sell some inexpensive palettes. 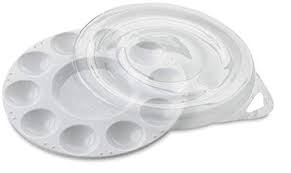  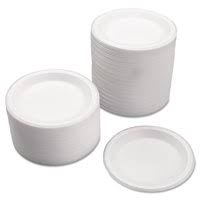 Brush Tub You will need plenty of water, and l always recommend having two containers, one available to clean your brushes and one for diluting paint and just rinsing. Large plastic cups will work, but what l prefer are brush tubs because, they usually have separate areas with ridges to asset in cleaning your brushes.    Canvas, Wood Boards and Canvas boards Canvas, canvas boards, wood boards are all great surfaces for acrylic painting. Value packs of canvas are available to purchase at Michaels and are perfect to use for a great value. Prices all depend on the size you are looking for. Dollar stores also sell inexpensive painting surfaces such are canvas boards, wood boards and canvas in all sizes, that you can practice with. You can also find at your local art store canvas paper that has texture and makes an ideal surface to practice your brush strokes.   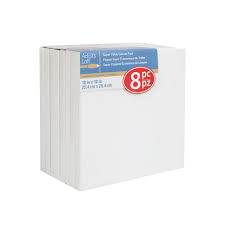 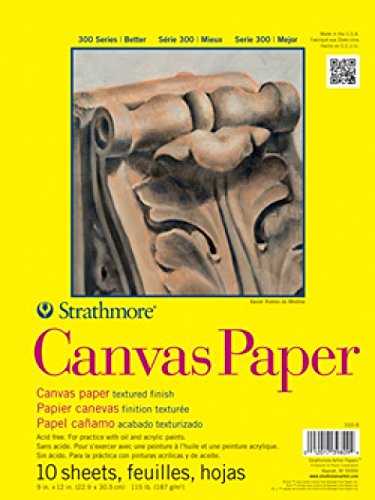 Acrylic Paints Your paints can help greatly in your progress as a painter, what usually happens is a hesitancy on investing in the ‘good quality’ paints until you yourself become a better painter. Although there is so much to learn with paints, l will have to write a more in-depth blog about the differences between student and artist grade paints, which brands and colours l prefer and why?, so stay tuned as this might be my next blog topic. I recommend two brands that l absolutely love, for the value and quality, “Liquitex Basics” and “Grumbacher Academy” acrylics. Both brands offer different starter colour sets as well as individual tubes in different sizes. You can find these brands at Michaels, Amazon and most art stores, prices vary, depending on the size of tube and set you desire.   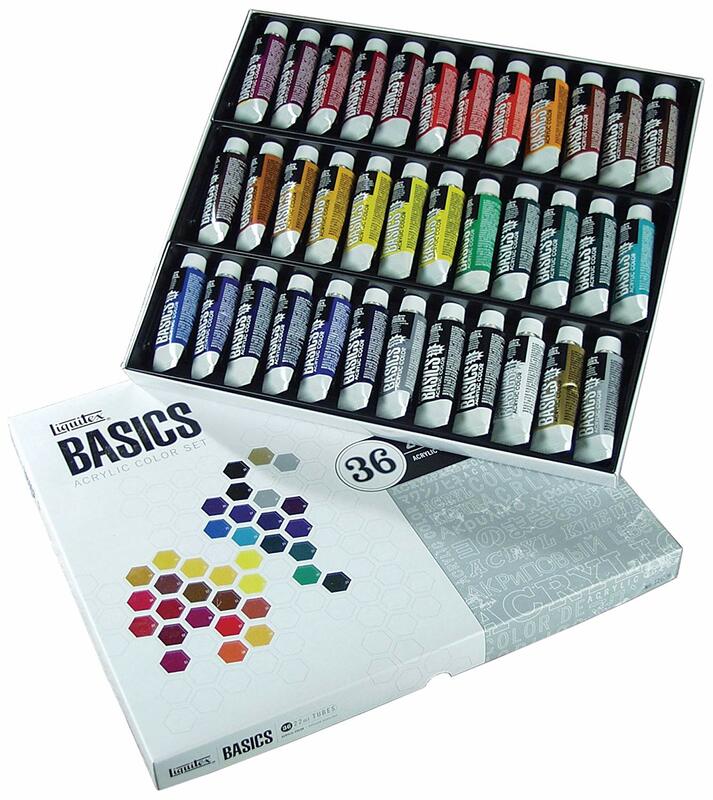 Other Useful Supplies Here are some other useful supplies that you may already have. Q-tips are helpful for cleaning a tiny mistake on your painting, blow dryer to help your paint dry quickly if needed, masking tape for covering a surface, and a pencil to draw your design on your painting surface if desired. Lastly paper towels, for easy cleaning of your brushes, absorbing extra water and cleanup.  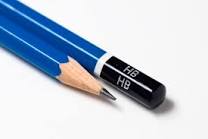 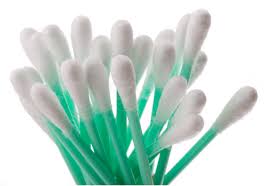 I hope that you have enjoyed this blog and for those of you who want to try acrylic painting, don't wait. It is so much fun and rewarding. Click my "Classes" page and join one of my painting classes. See what appeals to you. You will learn so many useful painting tips and tricks. Click the links below to follow me on my social media platforms. Until next time my friends, wishing you all a beautiful and creative day. Alice
1 Comment
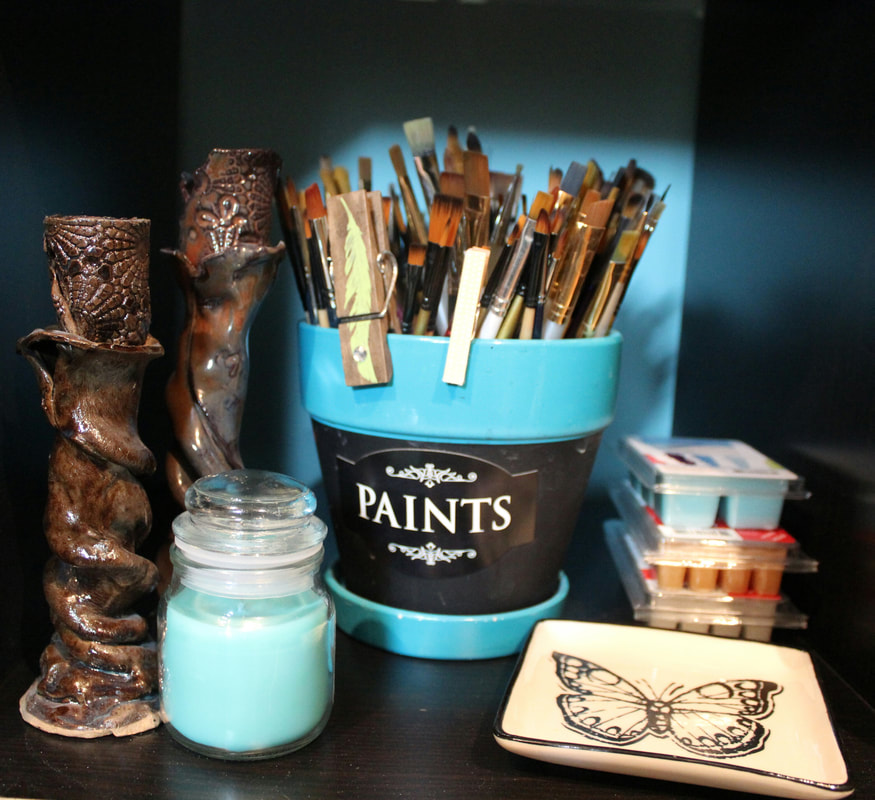
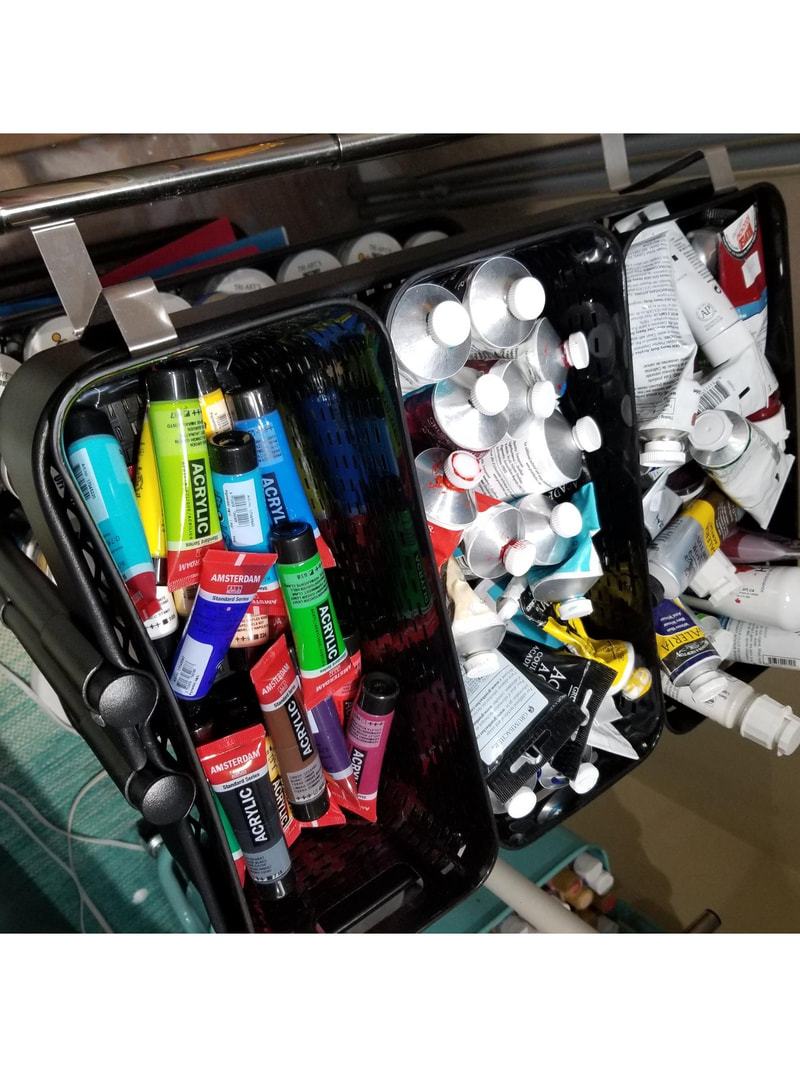
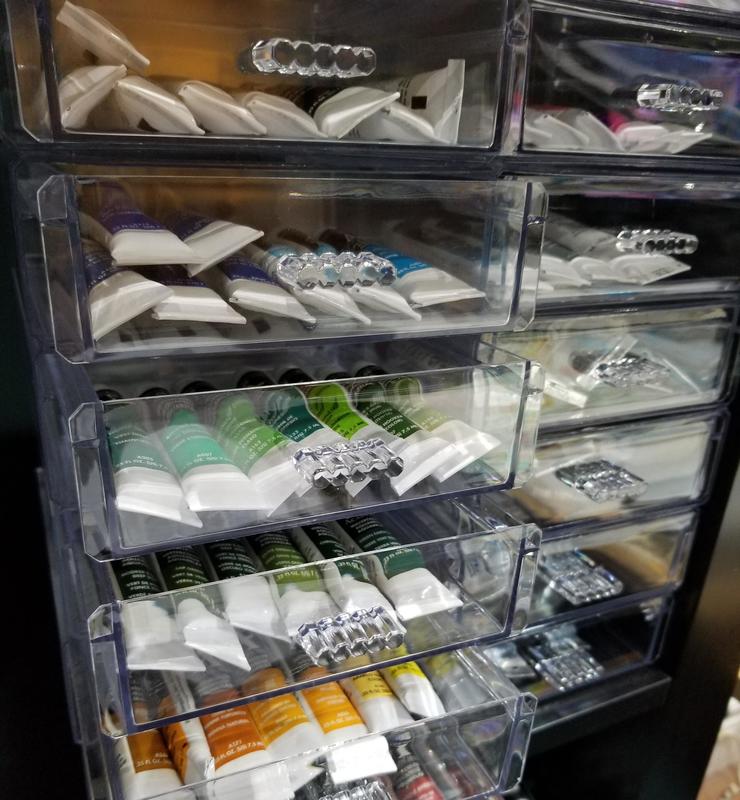
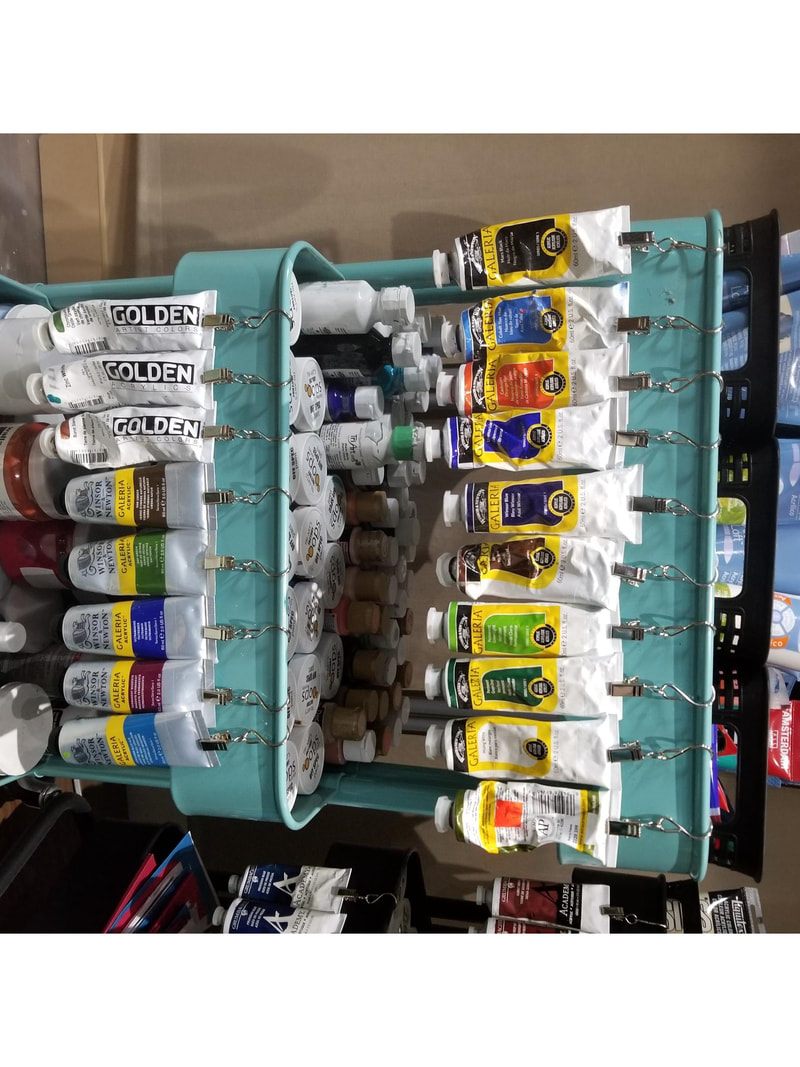
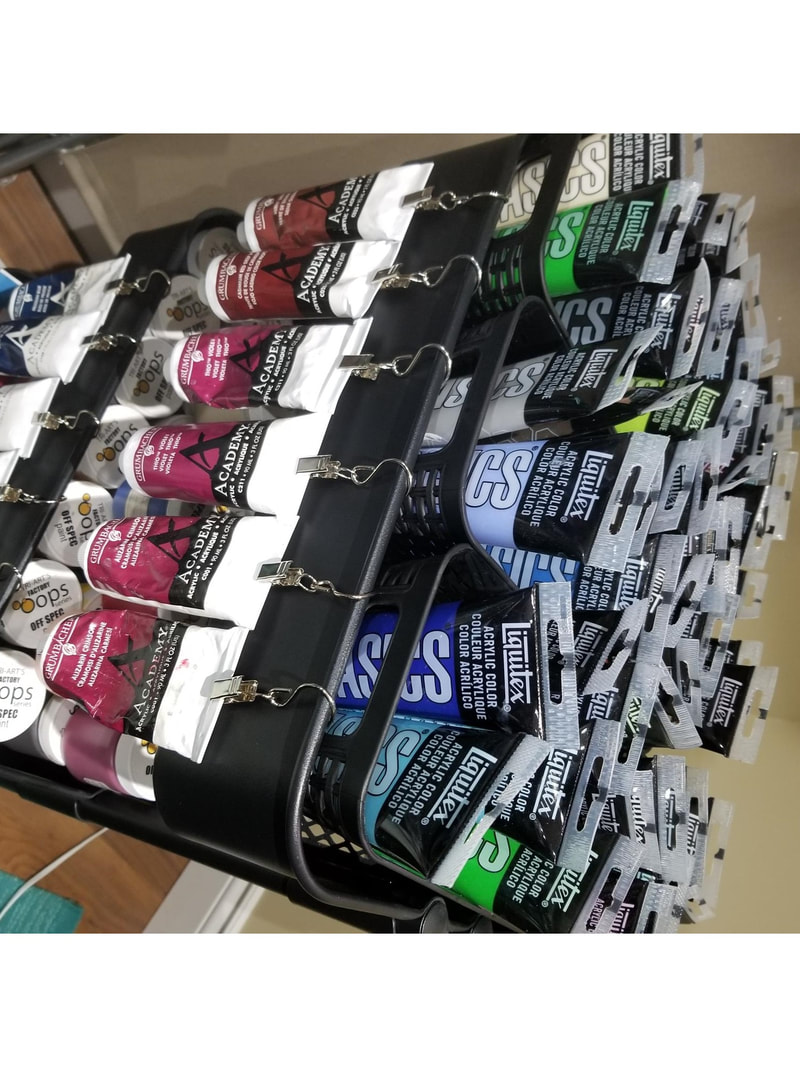
Hello Friends, Are you looking for storage and organizing ideas for your paints? You are in luck, because on my blog today, l am going to share with you different DIY ideas and economical ways that l use to keep my artist paints organized and uncluttered. There are so many different brands of paints on the market, all in different shapes and sizes, and it can be a challenging task to keep paints organized. Some require more room and unique storage ideas and as your passion for painting grows, so does your collection of brands. Painting for over twenty years and having the desire to try different paint brands, has left me with a vast variety of tubes, and bottles in all different shapes and sizes. After having a few disasters with my paints, solely because l was careless with them, I was determined to put a stop to my paint tube disaster. My professional paints are a hefty investment, so I started looking for ways to organize my inventory to help keep my paints grouped, knowing what colours needed to be replenished and the biggest advantage was spending less time finding the colours l wanted to use. I can’t take credit for all my organizing efforts, as my hubby is skilled in building what l dream up, l am so lucky and grateful for his support. He has for sure helped me build a lot of my projects, so finding extra help can come in handy with some of your DIY projects. I have tried to keep my ideas simple and economical. I tend to be a frugal shopper but l also try to use or buy materials that are sturdy and will last, so keep that in mind when you are finding other ideas to organize. Sometimes it is worth paying a bit more to get durability and longevity. For some, portability is important and l kept this in mind when l was organizing my art studio. If l had to move, most of my systematic ideas could move with me. 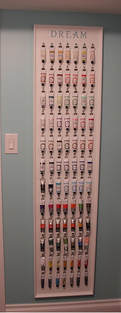 1. DIY Binder Clip Paint Tube Organizer Let me show you one of my favourite DIY storage ideas in my studio. Professional artist paints in general can run you a crazy amount of money, especially oil paints. I wanted a way to store them, not only for easy accessibility but also to prevent tube leakage. I first saw this idea on Pinterest, and totally fell in love with it. I was determined to build one that would match my studio. The first step is to measure your wall space and establish how big you can make one. The size of your paint tubes will be the determining factor in choosing the spacing on your board. My wall allowed a board that would hold 84, 37 ml tubes. You can hang 150 ml tubes, only you have to space them out according to the size of your board. For this project l used a large piece of MDF, binder clips, screws, paint, measuring tape, nails, wood glue, thin trim board, and of course an amazing hubby who constructed it for me. The most time consuming part to this project was measuring out the distance for your tubes, and screwing in all your binding clips. Once hung on the wall, you can organize your tubes of paint to your desire. 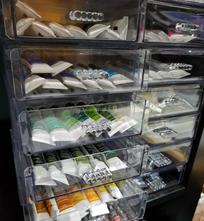 2. Stack-able Storage Makeup Organizers Using storage stack-able makeup organizers are a perfect idea and size for storing smaller paint tubes. Not only are they economical as l paid a $1.25 each at the Dollar Tree, but they are stack-able and they look visually pleasing on a shelf. I use them to store my 5 and 7.5 ml watercolours, but l would think you could fit a bigger sized tube if needed. Being that they are clear, I organize my paints by colours, making it a breeze to find the ones l need quickly. This is a simple storage idea that is easy to rearrange and add more containers too, as your collection expands. 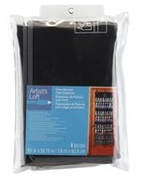 3. Door Hanging Organizer I found a door-hanging organizer four years ago, made by “Artist Loft” useful for storing larger sized 118 ml tubes. You could also use an over the door shoe organizer, but try and find one that is made of durable material, (these are also great for storing spray paint cans), or it won’t sustain the weight. The one l used had 84 slots. l have since, removed this organizer, but it was an economical and easy idea l used for a few years, so l thought l would include it in this blog.  4. Trolley Cart My most often used acrylics are stored in rolling trolleys. They are movable and l can store a lot of paint in them. I like that they are made of metal, so you can hang other useful magnet organizers and hooks on them. I personally love this option because they are super durable and portable. I keep mine near my easel for easy access when l am painting. I found perfect sized baskets, at my local Dollar Tree, to keep the colours organized by brands and sizes. 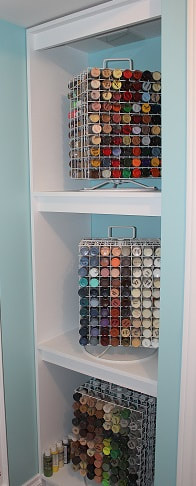 5. Rotating Paint Racks This storage suggestion is ideal for 2oz. /59 ml bottles. I have used these rotating paint racks for years, but they are superb for finding colours quickly and are overall durable. The only con is they take up a lot of space. The ones l use hold 160 bottles but l have seen online smaller racks that hold 112 bottles. They are super heavy when stocked, so you need to make sure it sits on something sturdy. 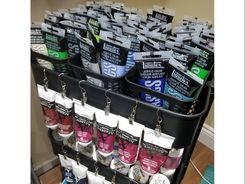 6. Hanging Clamps with S Hangers This organizing idea is super easy, economical and ideal to hang your paint tubes neatly. I found these hangers on Amazon, 50 for $13.99. They clip to the bottom of your paint tube, and because they have an S hook you can hang them from a rod or anything that you desire. I found hanging them from the edges of my trolley worked well. I absolutely love this idea, because looking for the colours l need is effortless. Visually it looks neat and tidy and it is an extremely affordable idea. I would love to hear some of your organizing ideas, so please feel free to comment and share them with me. Mastering the mess helps me feel comfortable in my haven and l hope that l have inspired you in some way to do the same.
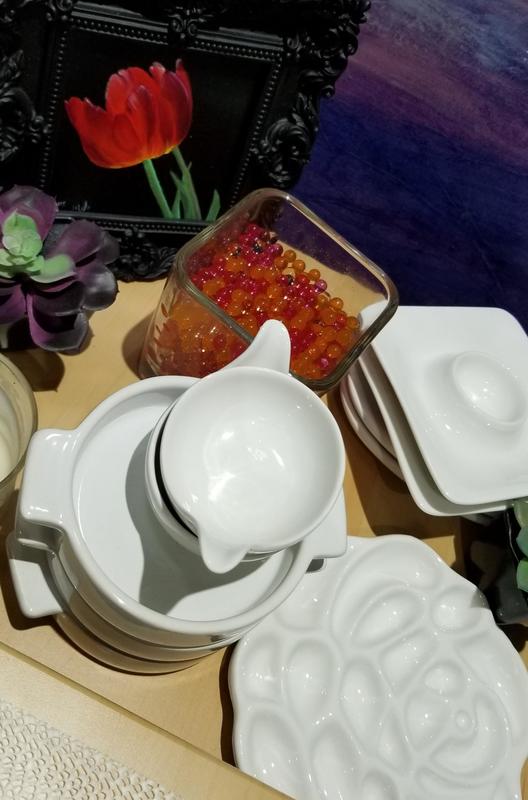
Wishing you all a beautiful day, Alice Hello friends and welcome back. It’s been a while since l have posted a blog, and I am sorry if l have been MIA for a while. I ventured off to the Azores for a few weeks and then came back to tones of work that l had to catch up on. I am finally back on track and thought l would share with you an art supply that is not a necessity but l have recently found to be an asset. Lately l have been collecting porcelain and ceramic palettes. I honestly have no idea why it has taken me so long to try one of these palettes and l don’t know why l missed out on using these palettes for years. Ever since l tried one l have been on a mission to collect and try all different kinds, as l absolutely love using them for my watercolours and acrylics. I encourage you to try one, the colours appear true when mixing in one, as they tend not to get stained, and cleanup is effortless. So let me tell you, that when you try one out, it will be a real treat. I also find them visually pleasing when leaving them out on my work station. They aren’t hard to find either as the variety out there is fantastic. They only con l find is they are not easily portable. Where do l Find Them? Before l begin talking about the types l prefer, l want to assure you that l am not being sponsored on any of these products and these are my own opinions. When l started looking for a porcelain or ceramic palette, I found that some had small and what looked like poorly designed wells. I read that this could potentially damage your brushes and be difficult to use, so I tend to look for ones that have bigger wells such as porcelain egg palettes. I love these, because they have oval wells that are generously sized to store and mix your paints, they are slightly slanted and are big enough for large brushes. Some palettes don’t come with mixing wells, so I use both palettes to store my paints in and all sorts of porcelain and ceramic surfaces for mixing, such as simple white plates and ceramic flower palettes, these are affordable and great for mixing. 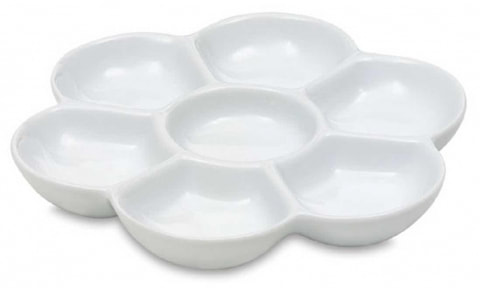 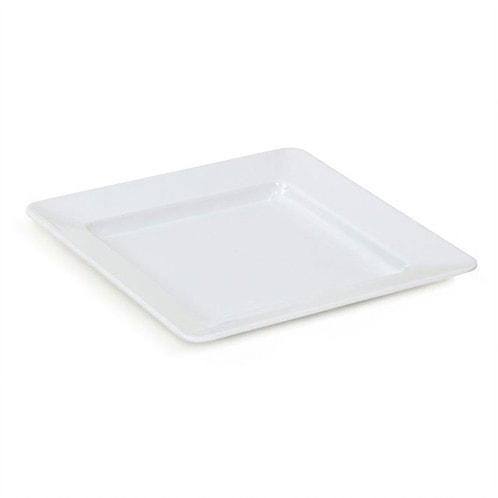 However the con to using more than one, is space. If you’re limited, you may not want both on your working area, it’s all about preference and what you like working with. Try to find a palette that includes a ceramic lid that can also be used for mixing. Personally, l prefer using both. l have my palette to store my paints in and a separate surface that offers me lots of room for mixing and the capability for easy cleanup without disturbing my stored paints. I have found some of my favourites on Amazon, “Tannex Porcelain egg platter” it is economical and has large wells. It doesn’t come with a lid but you could always cut a plastic lid that sits on top. The “Atworth Fine White 5.7” 7 wells ceramic square artist paint palette” is also another one of my favourites because the wells are large enough for mixing and cleanup is speedy.  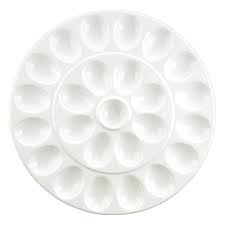 Now the next two palettes below, l lucked out and found at a local thrift shop for an amazing price, but if you are interested in getting the same ones, they are both available on Amazon. I absolutely love these for a couple of reasons. The “Trudeau Maison Snail Dishes, set of 4”, and “The Porcelain Stack-able Palette”, are great if you are looking for space saving and compact palettes, and because they are stack-able your paints are covered. The stack-able palette is ideal for mixing.  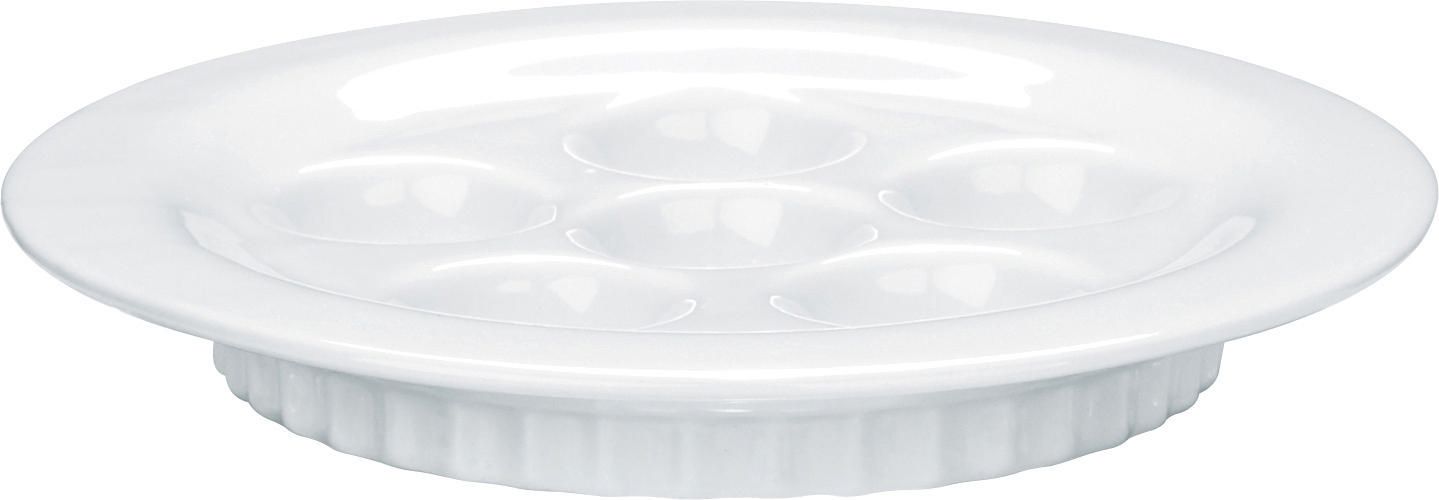 Check your local Dollar stores and thrift shops for white ceramic finds, such as white soap dishes, plain ceramic white plates, or any kind of white ceramic platters, these options are great for mixing trays. They are great spots for finding ultimate ceramic white palette treasures. I have lucked out a few times.  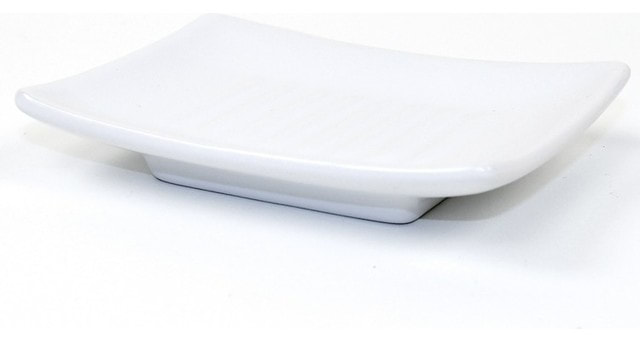 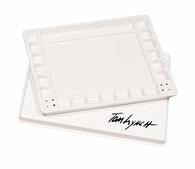 I have yet to invest in a porcelain all-one palette, although they can store a lot of colours and are extremely useful for mixing paint, they tend to be expensive. Without seeing them in person, the cost of shipping and then having to return it could be a pain. I believe they would take up more space than the other options l have suggested. I have to admit that there is an all-in-one porcelain palette that l keep checking for a sale and would like to buy as it had excellent reviews. It is the “Jack Richeson Tom Lynch Porcelain Watercolour Palette”. It has 20 outer wells that look slightly sloped, and it has 2 mixing areas and comes with a lid that l could use for mixing. Although it only has 20 wells and l would prefer more, l think for an all-in-one it has a nice design and it doesn’t seem too big.  If you are looking for a really cute ceramic palette that would make a sweet gift for your artist friend, then you will love this one. It’s the “Meeden Ceramic Rose Palette” measuring 6 inches in diameter, which l think is a perfect size. It isn’t the most ideal palette l have used, but l just love how pretty it is.  The “Jack Richeson 11 well porcelain palette with a lid” is a great one to start with if you are looking for something small that has a few wells and one area in the center of the palette for mixing. This is a great palette that l found on Amazon that won’t break the bank, and it works well. Remember to check out your local art stores as they can carry some really nice porcelain and ceramic palettes, and you can at least see which ones will suite your needs best.
Overall l have grabbed some great palettes that have been economical and enjoyable to use. I would love to hear which ones are your favourites, please feel free to comment below. Wishing you all a beautiful day. Alice 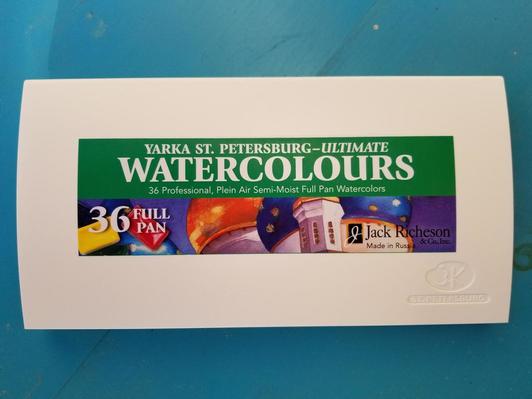 Hello Friends and welcome back to another one of my blog reviews. Today l am going to talk about the Jack Richeson, Yarka St. Petersburg Ultimate 36 Professional watercolour set. I am not being sponsored, these are my personal opinions. You all know that l love trying out new products and l have been so excited to try this brand. I purchased the 36 palette of their professional grade watercolours, which includes the following colours, Cadmium Lemon, Cadmium Yellow, Ochre Yellow, Sienna Raw, Ochre Golden, Cadmium Orange, Ochre Red, Sienna Burnt, English Red, Scarlet, Madder Lake, Carmine, Red Violet, Ultramarine, Cobalt Blue, Russian Blue, Emerald Green, Yellow Green, Russian Green, Umber Raw, Mars Brown, Umber Burnt, Sepia, Black Neutral, Violet Rose, Blue Lake, Hansa Yellow, Cerulean Blue, Olive Green, Paynes Grey, and Quinacridone Rose. Jack Richeson & Co. is a supplier, manufacturer and importer of amazing art products, the St. Petersburg brand being one of them. The watercolors are Russian made in a factory known for its quality. You know something is made right if a product has sustained credibility for over a century. These watercolours are liquid-poured and semi most into full pans, they are available in full pan sets or individual full pans. You can imagine the history of these watercolors. I was really impressed how they use the finest raw materials, pigments and guarantee the highest possible light and colorfastness. As an artist who sells a vast majority of my work l want my clients to value my art and know that it will last. This brand will for sure deliver the durability that artist’s desire. I was really impressed how all the pans came individually wrapped, indicating colour names, lightfast rating and opacity. They were organized in a perfect sized, white pallet that folded out giving sections of room for mixing colours. l was impressed with the assortment of colours offered with this palette, and the vibrant colours were reminiscent of candies. 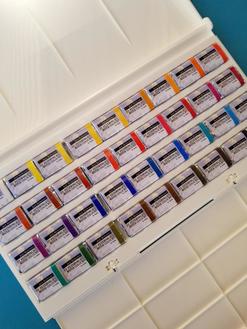 I debated on showing you a swatch of all the colours but decided not to, to be brutally honest l find it boring when l see this done on other blogs. I would personally rather see a painting created with the product, but for true beginners l do see the benefits as it allows you to become familiar with pigments and quality. So I’ve decided to create two small paintings, one with softer and one using bolder colours. Here is a link to their colour swatches in case you would like to see the variety available. These watercolours certainly didn’t disappoint. As an artist pigments are of a huge importance to me and the pigments in this brand are truly impressive. From the first brush stroke l knew that l was using a quality product that would deliver a high permanence rating, with no fillers in this brand. I know that watercolor paint is valued for its transparency and ability of light to pass through the paint, this paint can deliver this result with confidence. Another great attribute that this brand offers is the lifting power of colour, whether for technique or a mistake. Although you do get some staining, l was impressed on how easy l could lift the colour to reveal the white underneath.   You can find this brand at Curry’s Art, Delta Art, and Amazon, they all offer Canadian shipping. Pricing is comparable if not less for your wallet than other professional grade watercolour brands. In fact l think you get your money’s worth with this specific palette set. I am a value shopper and l was able to get a half price deal for $109 at Delta Art online. Keeping an eye on art supply prices will help your budget go further. This brand is one of the best pan sets l have used to date, as they offered the quality and performance that l look for in a watercolour and l would encourage you all to experiment with this brand.
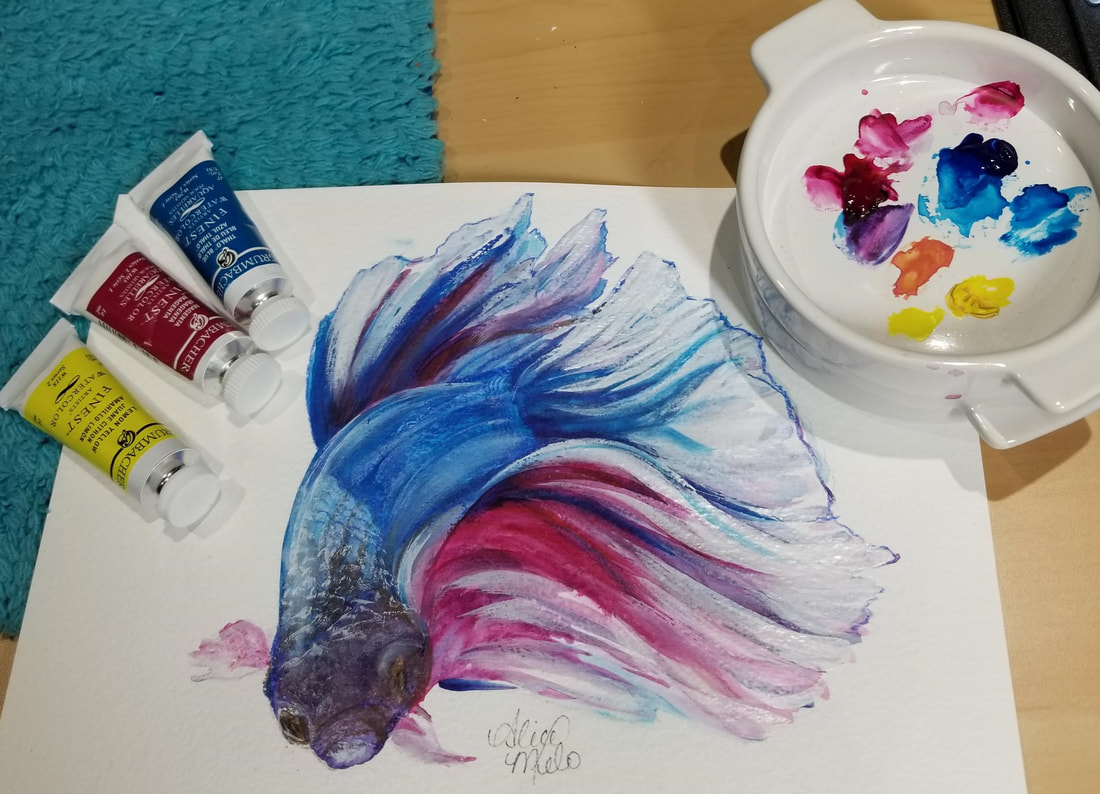
Have a beautiful day, Alice 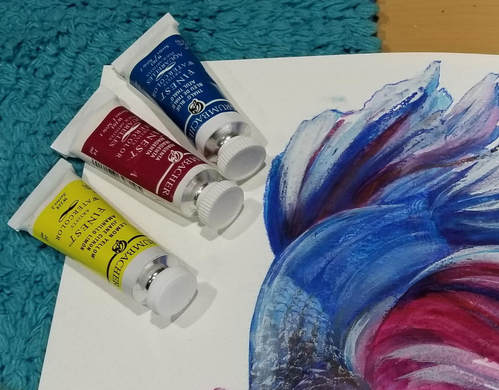 Hello Friends and welcome to another one of my blog reviews. I have been super busy trying out some great products and l am going to be reviewing one of the supplies that l was most excited to try. Today l am going to share with you my thoughts on the Grumbacher Finest Watercolors that was sent to me by Chartpak. Thank you Chartpak for your generosity. I love trying professional grade products and let me tell you that this product by far is one of the most pigmented watercolors that l have tried to date. Now remember that these are my personal opinions and l am not being sponsored by Chartpak. After reading about Grumbacher, l was intrigued to learn that they have been established since 1905, they must be doing something right as they have been trusted by many artists, far and wide. By 1960s, Grumbacher became an art materials empire, offering artists nearly every supply thinkable. Today the Grumbacher brand is owned by an American manufacturer called Chartpak Inc, who take great pride in providing quality products and service. I have become one of their trusted artists and l love using their products. Before l start telling you what l thought of the Grumbacher Finest watercolors, l have to say that l was surprised l didn’t find a lot of information on this brand, but l did find a lot of people commenting and reviewing that they love them and l can now see why. I was pleasantly surprised to find out that Grumbacher offers these professional grade watercolors in 63 amazing colours, 14 ml tubes. I also found them sold on Amazon in 7.5 ml sets. Chartpak sent me 3 colours to try, Lemon Yellow, Thalo Blue and Magenta. My example below is done on Grumbacher 140 lb cold press watercolour paper. Let me know if you would like me to review the Grumbacher watercolor paper? These watercolours are formulated with premium grade pigments and right from the start l was impressed on how they lay down beautifully. I was able to obtain a high pigmented even wash and l was so impressed on the graduated wash from dark to light. They had exceptional tinting strength. This brand offers excellent light-fastness and l love how easy the colour chart is to read and understand. Below is the link to the Grumbacher colour chart, and all the colours will indicate the light fast rating. 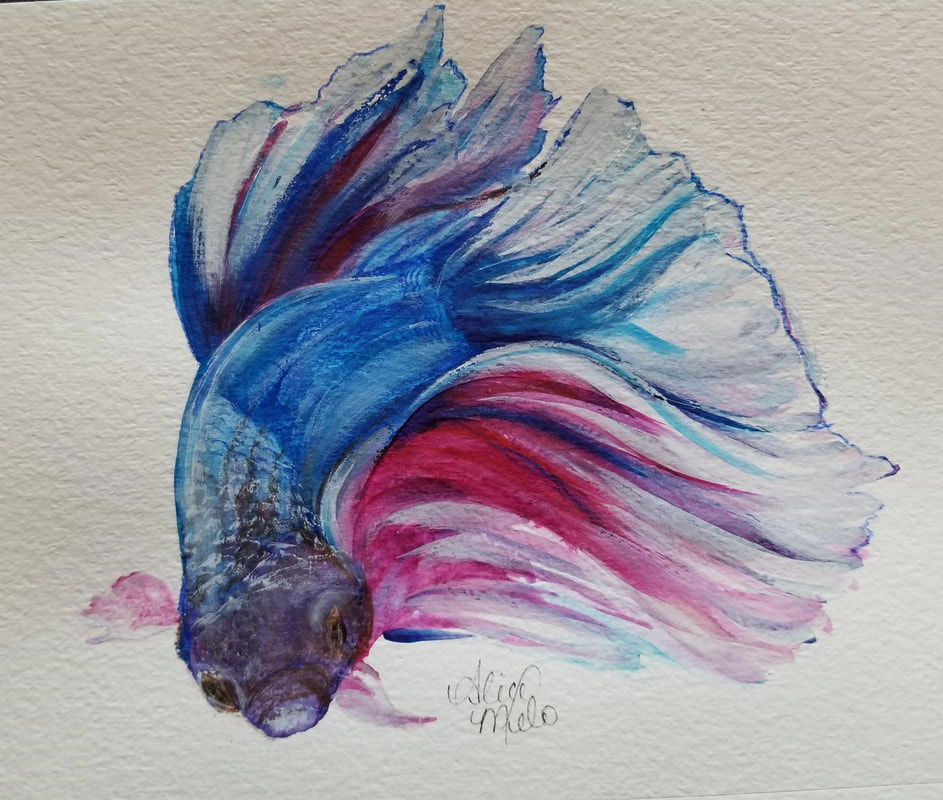 Grumbacher also sells Academy brand watercolours that l have not yet tried and hope to review soon. l easily found the student grade brand in stores, but l had a really hard time finding the Grumbacher Finest professional watercolor line. I did manage to find the professional grade ones sold on Amazon and the prices varied from $10.59 to $19.63 depending on the colours. Amazon also sells the 7.5 ml eight colour set for $88.49. This traditional medium is always a treat for me to use and l have nothing but positive comments about the Grumbacher Finest Watercolors. These watercolours truly prove that Grumbacher provides outstanding quality and they have experience in this medium. I can’t wait to add more colours to my collection. If you have tried this brand of watercolours l would love to hear your thoughts and comments. My social media links are below, please feel free to click them and follow my work and reviews. Have a Beautiful day,
Alice 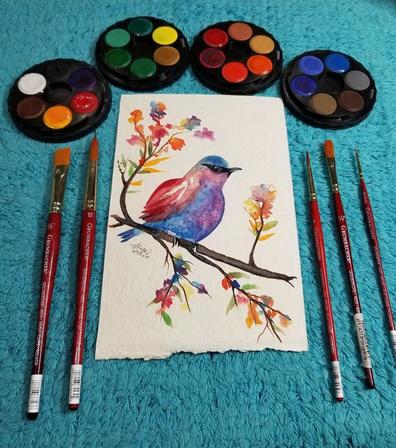 Hello friends and welcome back, l am excited that you are joining me on another blog. Only this time you are getting a two for one blog review as l am testing two products today. Chartpak sent me an impressive art haul of products to try out and l have decided to critique the Koh-I-Noor opaque 24 watercolor stack pack palette, and the Indigo Artpaper 640gsm/300 LB 100% cotton, cold press, acid free watercolor paper. Although l have been sent these products, I am not being sponsored and this review communicates my own opinions. First up is the Koh-I-Noor opaque stackable 24 watercolor palette. Koh-I-Noor is one of the world's largest producers and distributors of art supplies, writing equipment and stationery. Founded in 1790, the company has since developed into two divisions one in North America and the other Europe, offering many art and drafting supplies for beginners and professionals. 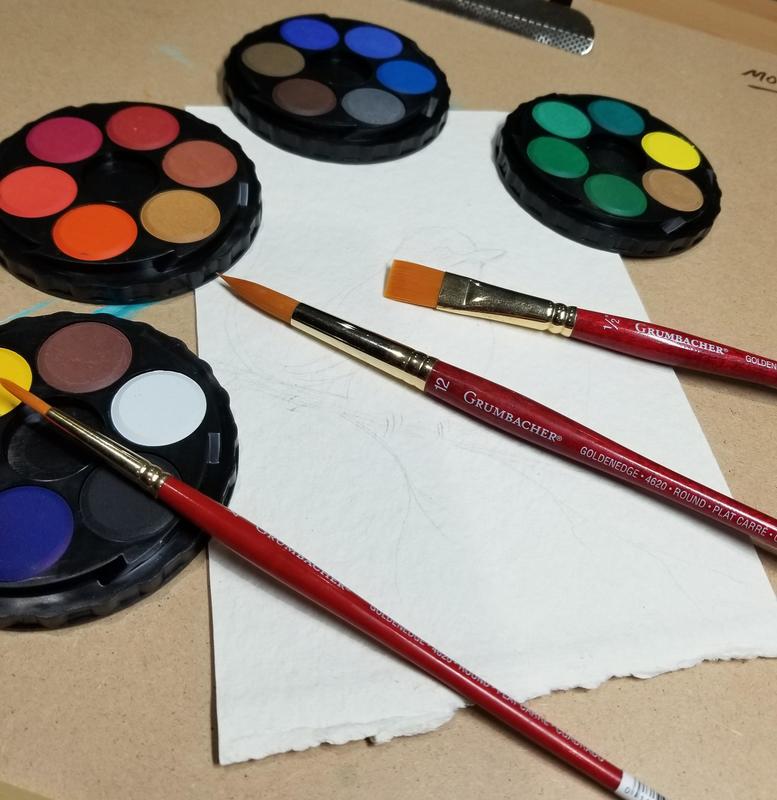 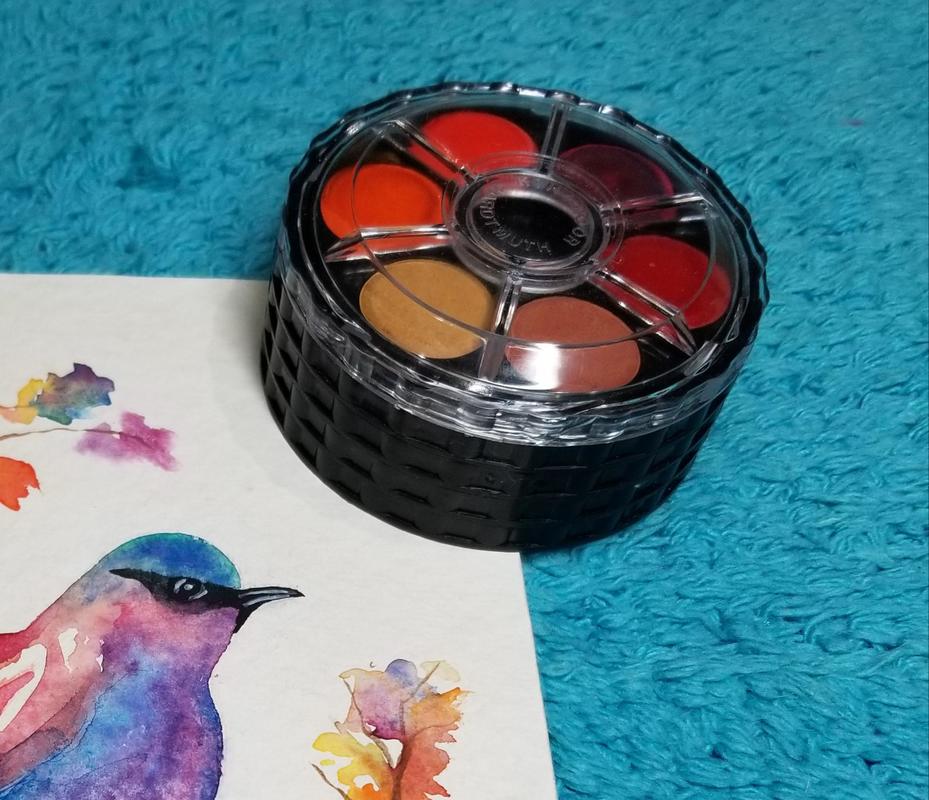 When l first saw this Koh-I-Noor watercolour palette, l was impressed at how 24 colours were condensed in this little round palette that could fit in the palm of my hand. Offering 4 round small plastic palettes with 6 colours in each one that twist together to make it stackable and convenient for storing or carrying. This palette is classified as a student grade product and does not offer light-fastness, so keep this in mind if you are selling your originals, chances are your work will fade. Not to say that you couldn’t sell prints of your work, so don’t fear the student grade status. This 24 colour set which is also available in 12, or 36 sets, offered enough colours for mixing and l was really surprised at how brilliant they were. When l started to use them, l found the colours lifted easily when wet, so mixing the colours together wasn’t a problem and l found they laid down on the paper easily too. I was exploring this palette with the mindset that it was student grade, so l didn’t have high expectations, but l was really surprised at how vibrant the colours were when my painting dried. Would l recommend this palette? for sure, especially If you are looking to practice with watercolours or if you want a set for illustration then this small portable watercolor palette is ideal. Where can you purchase it? Just about any art supply store and Amazon sells it, the price ranges for about $9.95 CDN. If you are someone who loves creating art on the go, then this is a perfect traveling wheel palette, given the value of this product it packs a punch of colour and won’t break the bank. I have to admit that l haven’t tried a lot of different watercolour papers, but l do know a good one when l see one, so when Chartpak sent me a package of Indigo Artpapers l was intrigued and excited to try them. I really wanted to see how a student grade watercolour would work and look on a high quality watercolour paper. Indigo Artpapers is based in Canada, and produces handmade archival quality papers made in their mill in India. Their products are exclusively made using high quality cotton rags and flax fibers not wooden pulp. They pride themselves on their “Go-Green” philosophy and produce environmentally friendly paper to artists globally. When l opened the package l was so impressed with how thick the 640gsm/300 LB 100% cotton 5 x 7 inch piece of paper was. There was no way l would be able to tear it, you would have to cut it if you required a smaller size. I decided l was going to use the Koh-I-Noor student grade watercolours on this ivory white coloured paper. As l started my painting I loved how the paper allowed the watercolours time to soak in, giving me time to play with them when l was laying the colour down, it also gave me time to pick up the watercolours by dabbing them with a paper towel as needed. Since this paper was of a smaller size, l decided l wasn’t going to presoak it. 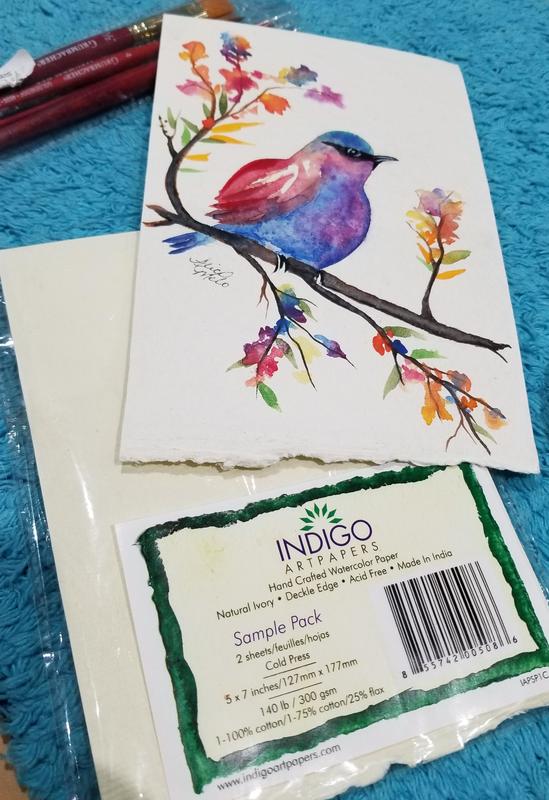  I later learned that the papers are separated manually from felts and each sheet hung on a cloth line and loft dried, this kind of drying allows the fibers to dry slowly, contract and mesh naturally to attain its strength, hence why it is so durable. I didn’t need to achieve a large watercolour wash on my piece l painted, but l don't think this 300 lb paper would distort in shape if you needed to add a lot of water. What l did notice, when drawing out my outline if l needed to erase my pencil marks it lifted the paper fibers, so be careful not to make many pencil mistakes, or it could be an issue and lift the surface of your paper. Indigo Artpapers are available in 100% cotton, or 75% cotton and 25% flax offering it in 140, 210 and 300 lb weights. You can find Indio Artpapers sold in Canada at The Paint Spot and Delta Art, the pricing does vary but extremely reasonable for the quality you are getting. If you are a professional watercolour artist and have not tried this brand of paper then l recommend sampling it. I give the 100% cotton 300 lb acid free, environmentally friendly watercolour paper an impressive two thumbs up. Way to go Indigo Artpapers for delivering high quality paper, you have the trust of this artist. Don’t forget to follow me on Instagram and Facebook to stay connected you can find the links below. Until next time my friends, wishing you all a beautiful day, Alice 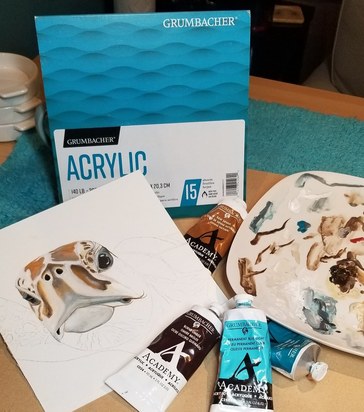 Hello friends and welcome back, l am excited that you are joining me in another one of my blog reviews. I am thrilled that Chartpak Inc, sent me some great products to try out and lucky for me, l get to share my thoughts about them with you. It was hard to choose what to practice with first, but l have chosen to try out the “Grumbacher Acrylic” paper. Although l have been sent this product, I am not being sponsored and this review communicates my own viewpoints. 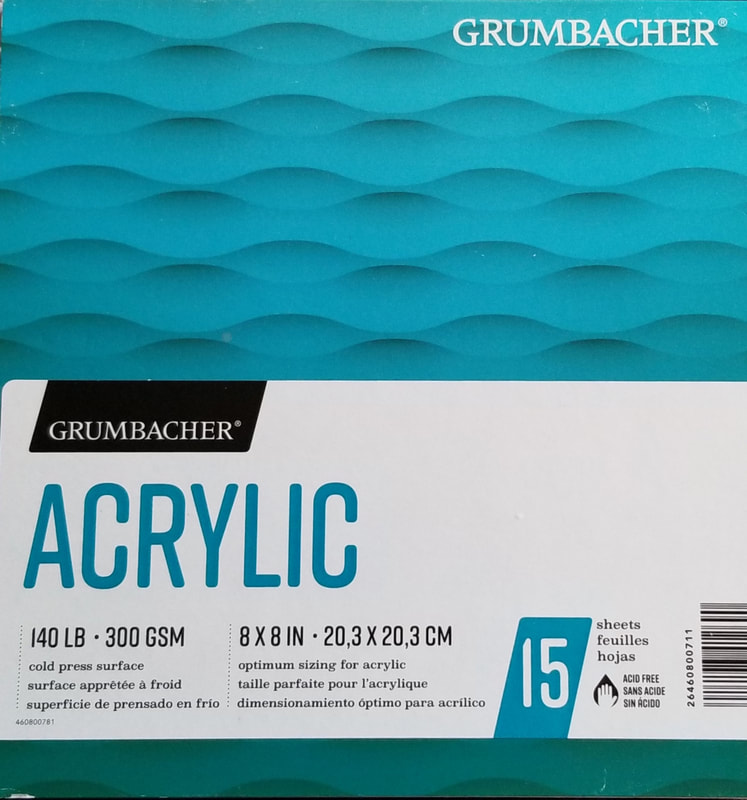 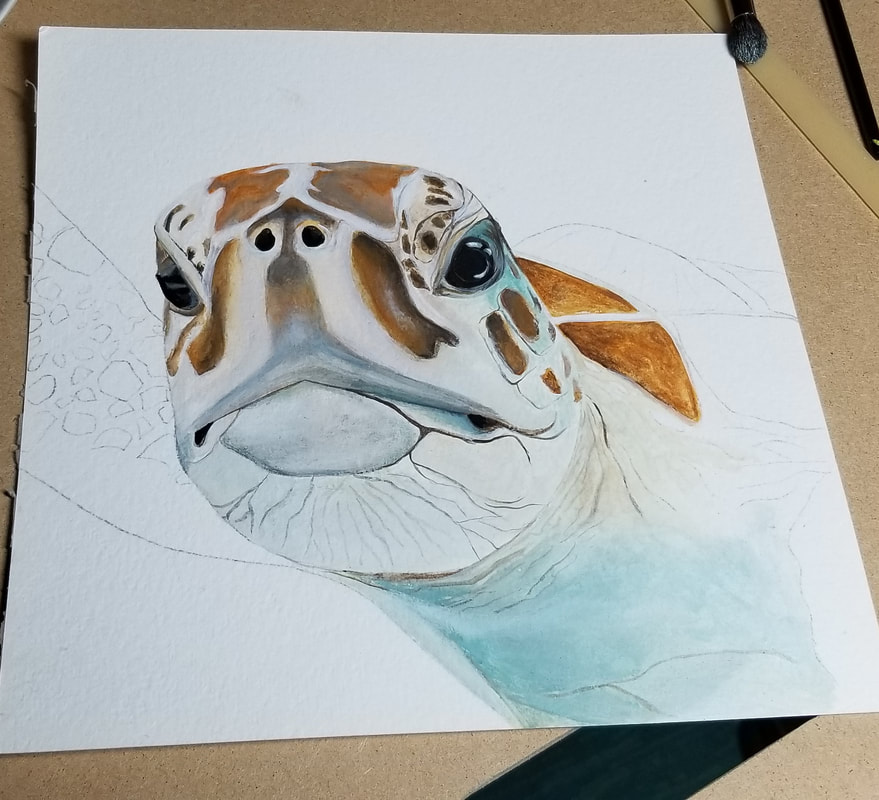 Chartpak Inc generously sent me an 8”x 8” size “Grumbacher Acrylic” 15 sheet pad of paper, that instantly caught my eye. I guess l should be a bit embarrassed that l have never tried painting on acrylic paper before, largely because l have worked with acrylics for 21 years, but l haven’t been interested in using it, until now. I was not expecting to be intrigued nor astonished by this heavy paper, as l have used many different brands of mixed media papers before and l thought this paper would be just like the others. This was not the case with this acrylic paper, as it was different then the mixed media papers l have used for charcoal drawing and watercolours. I was really impressed with this high quality acrylic paper. The turquoise coloured cover was total eye candy, and it had an easy to understand rating system of all Chartpak papers in the interior cover. This acid-free, cold press paper rated excellent to a vast variety of mediums, such as graphite, colour pencil, charcoal, pastel, pen & ink, marker, watercolour, gouache and acrylic. I noticed it was embossed in texture, but at the same time the surface felt smooth to the touch, almost a satin like finish, which l haven’t felt on other papers before. I decided l was going to paint a sea turtle and l chose not to washi tape the paper down to see if it would change in shape. As l added the paint, l noticed right away that l was able to manipulate and move it around effortlessly. Immediately l knew this was going to be a fun piece to create, as this paper was going to allow me to use different painting techniques freely and easily. 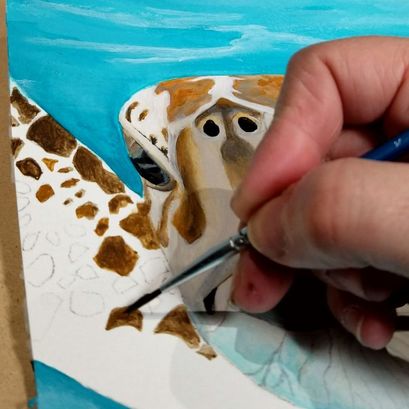 The smooth but embossed surface was rewarding, as it gave me enough time to blend my colours, and soften the brush strokes with a mop brush. I tend to start light in colour and layer my paints to add depth. Using this method l mix my acrylics with water and use it as a wash. I was afraid that the paper would start to tear or change the texture as l kept adding the watery acrylics, but this was not the case at all. I was so pleasantly surprised at how durable it was. This 140 lb, 300 gsm white paper allowed me to continue to rework and keep adding paint and water. In some areas, my sea turtle has multiple layers of paint washes and l could have added more if l desired with no change to the surface of the paper. I was expecting this acrylic paper to be absorbent, making the acrylics faster drying but I didn’t notice any irregular changes to the Grumbacher acrylics that l use most often. The most likable quality about this paper was just how much time l had to maneuver the paint around, and this was the biggest benefit to my style of painting. I was able to blow dry the paint just like l do canvas, l held the blow drier at the same distance, high heat , as l normally would and l didn’t burn the paper, although l would be cautious just in case. I also found detailing on this paper a breeze; I was able to acquire fine line work easily. At one point l panicked as l accidentally made a paint stain and l was so surprised when l re-moistened the unwanted mistake that the paint lifted easily off the paper. Wow, that was such a bonus to be able to clean up mistakes easily. My only regret was not washi taping the paper to my drawing board so that it dried flat, as it did not retain its original shape, due to the amount of water l used, but not enough of a distorted change that it was an issue. I did go looking for other sizes in this brand, as l would like to try and work on this kind of Grumbacher Acrylic paper again but in a larger area using other mediums. According to the Grumbacher website, they have larger size options. They are available in traditional fold-over construction, (what l was sent), as well as dual loop wire bound construction with “in & out” pages that allows you to remove the sheets from the pad and return the sheets into the pad. I will go over this “in & out” construction in a future blog. Would l use this paper again for acrylics? Absolutely! If you live in Canada and want to try this paper, then you can find the “Grumbacher Acrylic” paper offered in all three sizes at an amazing price through “Delta Art & Drafting Supplies”. You can order online at www.deltart.ca. The pricing l found on their website in Canadian funds is listed below.
I am hoping at some point the "Michaels Arts & Craft" store in Kingston, Ontario, will carry them, but until then, the prices at "Delta Art" are extremely reasonable even if there is a bit of a shipping cost. It’s an exceptionally good price. I am giving this product two thumbs up! l would highly recommend this product to beginners and professionals. If you are looking for a durable high quality paper, then this unquestionably is a great choice. I would love to hear from you. Have you used the “Grumbacher Acrylic” paper? If so, what did you think of it? 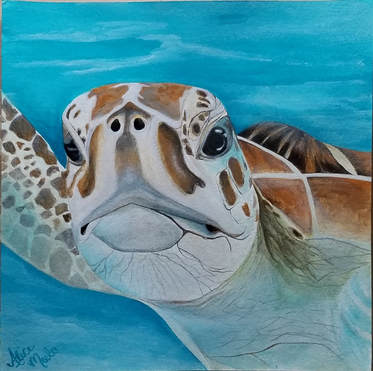
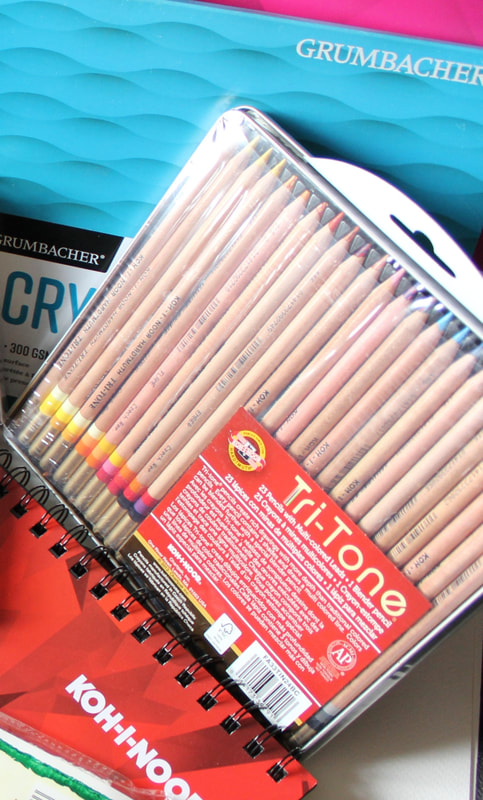
 Hello Friends, and welcome back to my blog, I am thrilled that we are connecting and thank you for all the great feedback on my recent blog about "Grumbacher Academy Acrylic Review", l appreciate that you can relate to this brand of acrylics, and so many other art products that l have been reviewing. Also a huge thank you to Jen at Grumbacher for sharing my blog on their Facebook Fan page. Woohoo!  If you personally know me, or have read any of my previous blogs then you will quickly realize just how passionate l am about art and art materials. In my April 6th, 2017 blog, l talk about “Tips on How to be a Successful Artist”, the content is helpful to better understand what l am trying to convey in this blog. If you have a chance, check it out too, the link is below. Not only is it important to make connections with people of the same interests and goals, but finding important and influential resources to help you along the way will make a difference and help validate your hard work. I also think it is important to discover and experiment with new mediums, not only will you expand your skill and profession but add new interests to broaden your talents. Chartpak has been one of my essential resources for so many reasons, they have already made a difference in my art world and here’s how? Since 1949 Chartpak Inc has been a diversified manufacturer, who not only produces innovative products for graphics but they are also diversified in branding and offer fine art materials, writing materials, craft, hobby and office products. Chartpak has become a globally recognized leader in creative products, with 14 brands that include 60 product lines and many are made in the USA or Europe. Chartpak's distribution division services customers in wholesale, independent retail, internet and catalog retail, and big box chains. One of the biggest box chain stores that stock their products is Michaels Arts and Crafts where l teach the Grumbacher fine art acrylic classes in Kingston, Ontario. Many of the brands that Chartpak provides are respected by professionals and hobbyists. Chartpak is not only a company who pride themselves on providing many well-known and great quality brands such as Grumbacher, Koh-l-Noor, Schminke, Higgins, AD Markers, Molotow, just to name a few, but they are also a company who supports and works with local and national art programs, events, institutions and artists to help foster community arts and encourage individual artistic expression. What a great company right? So not only do they provide great products with artists in mind, but they continue to help artists strive, and aid creative expression, a special thank you to Sophie and Lana. I personally love many of the products they offer, especially the fine art materials. Click on the link below to look through Chartpak's website and take a look at the brands and the exceptional fine art materials and grand writing products they offer. You may be surprised just how many products you already utilize that are listed on their brand portfolio. Chartpak has opened the doors to a huge audience of people including me, they have listened, and provide vital products at affordable prices. Recently l was contacted by Chartpak's “Director of Marketing and Creative Services” and l was given an incredible opportunity to review and blog about some of their products. You can just imagine how enthusiastic l was and still am about this amazing opportunity. I always welcome the possibility to create with new mediums and art supplies, especially products that are known for their quality and performance. I am familiar with many of Chartpak's products and brands, as l tend to check out their merchandise offered at Michaels at least twice a week, usually with a huge smile on my face, deciding on the next medium to experiment with. One of the brands and products that l immensely favor is the Grumbacher Academy Acrylics. If you haven’t had the chance to read my viewpoint on them, then click the link below and check it out. Thank you Chartpak for the art haul 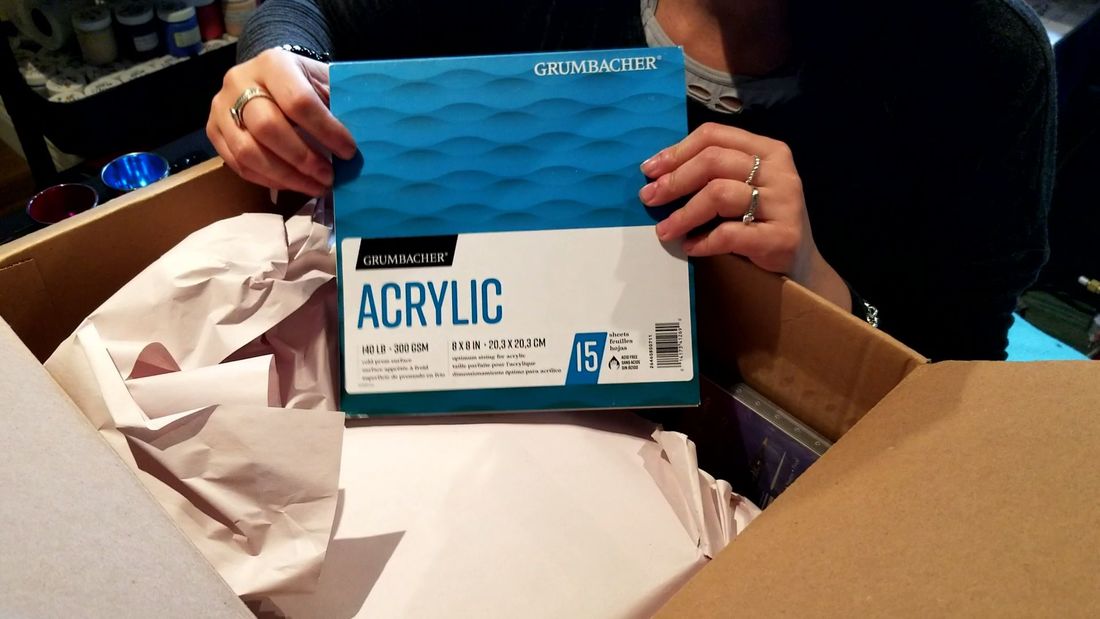 In the next few weeks l will be creating, reviewing and blogging about the art haul that Chartpak has sent me. I can’t wait to discover what l can create with the following items, Grumbacher Goldenedge watercolour brushes, Grumbacher Finest Professional watercolours, AD spectra markers, Koh-I-Noor Tri -Tone pencils, Grumbacher’s watercolour, acrylic and mixed media paper, and so much more. It’s an opportunity that l hope you will share and follow along with me. Although Chartpak has been so generous and supportive, l am not being sponsored and l will express honest reviews. My aspiration is to inspire you, not only to be creative but to try new mediums and products and step out of your comfort zone. What are your favorite Chartpak products and brands? Hope to connect with you soon. Here are the links below to my social media platforms, so make sure to follow me on my artful adventure. Thanks for all your support. l wish you all a beautiful day, Alice Melo 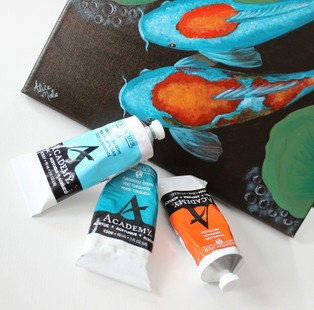 Hello Friends and welcome to my blog. I am reviewing Grumbacher Academy Acrylics. Although l was a Grumbacher Fine Art acrylic painting instructor at Michael's in Kingston for two years, I am not being sponsored to review this brand. I have been painting with acrylics for 21 years and l have tried many different acrylic products. I am going to give you my honest opinion on these acrylic paints. I effectively paint with Grumbacher acrylics and my students and l have been able to achieve numerous acrylic painting techniques with stunning performances and results. After reading about Grumbacher, l was intrigued to learn that they have been established since 1905, they must be doing something right as they have been trusted by many artists, far and wide. By 1960s, Grumbacher became an art materials empire, offering artists nearly every supply thinkable. Today the Grumbacher brand is owned by an American manufacturer called Chartpak Inc, who take great pride in providing quality products and service. “Max Grumbacher” started in the industry by hand making brushes, very inspiring as he started his business at his kitchen table. What impresses me the most about this company, is all the multi-media products, and online educational information offered.  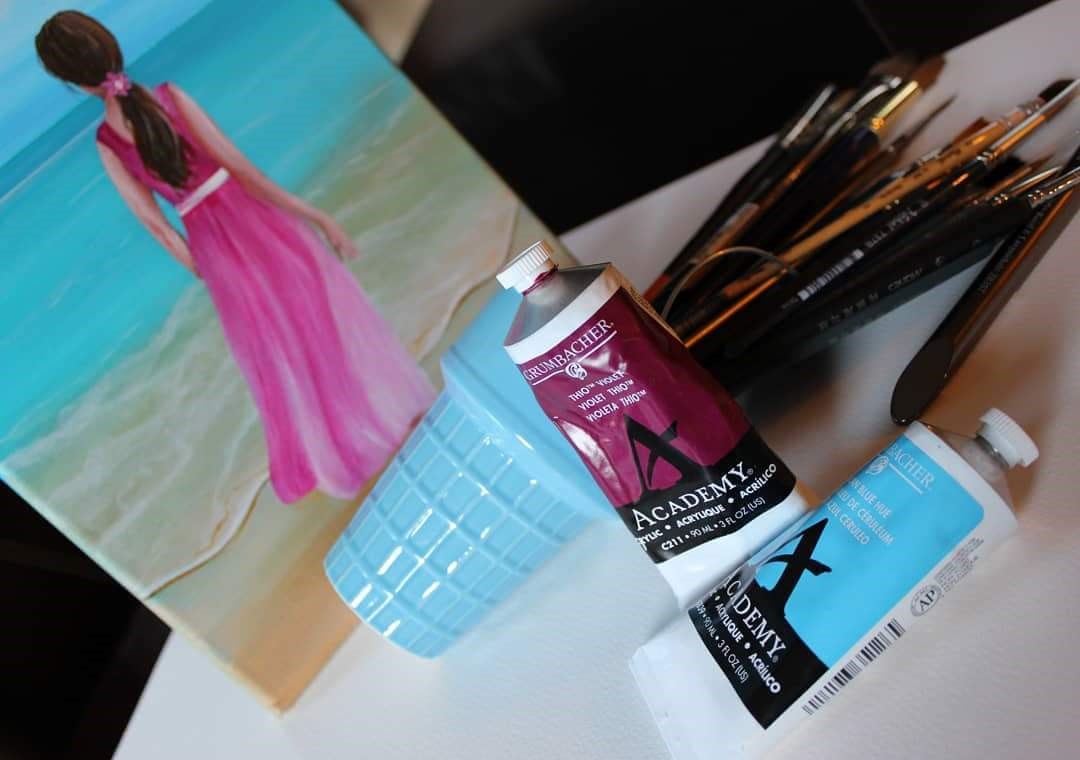 Grumbacher Academy acrylics always impress me, as the colours are so vibrant, and when adding water or gloss mediums, they retain their pigments. This is significant, and of value to me as l use a lot of washes in my work and these colours never disappoint me. The consistency and buttery like feel to these paints make me want to dip my fingers into the palette and feel how soft they are. They are smooth and easy to blend. I can’t say that l have ever had an issue blending with these acrylics. They are also a thicker acrylic, so for those of you who like a bit of texture in your work, try them out, you will be pleasantly surprised. The versatility that these acrylics offer is superb. They are not as fast drying as other brands l have used, giving you more time to play and blend with them, and l like that they don’t dry dull in colour. I do use the Grumbacher varnish to protect my work and in doing so my paintings offer a colour punch that is incredible once varnished. I have had clients ask me if l use oils on my acrylic paintings, that’s how vibrant these colours are. 48 intense colours are offered in the Grumbacher Academy brand, including metallic and iridescent. They are all rated excellent in light-fastness, and they are AP approved, meaning that this product is safe and certified in a toxicological evaluation, to contain no toxins to humans. You can purchase these acrylics in 75, 90 and 200 ml tubes, as well as a variety of different sets, from sets of ten, 24 ml tubes, introductory set of six 90 ml tubes. Many sets are offered and the prices are extremely reasonable for the quality you gain. I feel like l am getting professional quality paints at student prices. Does that raise your eyebrow?  By now l am hoping that you are intrigued by this product? In my opinion they are a must have in your acrylic paint collection, and if you are considering on trying acrylic painting then give these acrylics a try. I give these Grumbacher Academy acrylics two thumbs up! If you are looking for additional information on the Grumbacher Academy acrylics or any other Grumbacher products, Chartpak products, clink the links below. Please feel free to comment below. Wishing you a Beautiful Day, Alice Melo 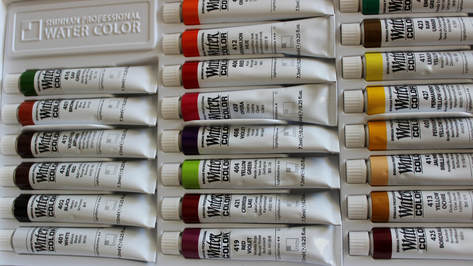 Hello my friends and welcome to my blog. Today l am talking about my first impression of the ShinHan Professional Watercolours, a Korean based company that are also known for specializing in colour luminosity, and quality paint products. They also have a line of markers called Touch markers, which have been compared to the Copic markers. I purchased a set of 30 "ShinHan Professional Watercolours" last August, with the intention of comparing them to a few other brands such as Holbein and Mijello Mission Gold. This review offers my own opinions and l am not sponsored to review this product. I have to say that after reading some mixed reviews about these watercolours l debated on purchasing a set, but l am so delighted that l did. I can’t believe that it has taken me this long to try them out, l was pleasantly surprised and here is why? 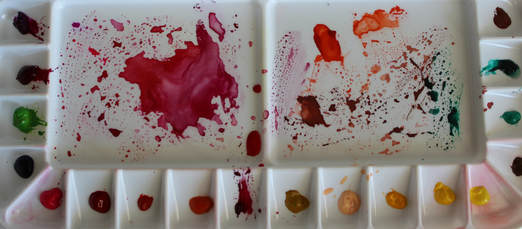 I read some critiques that recommended caution using these watercolours due to them fading quickly, but when l downloaded the colour chart and took a look at the information that ShinHan posted on this product, (www.shinhanart.com/eng/product/product_water.php), l found that it was comparable to other professional watercolour brands. Out of the 30 colours that are offered, 17 colours were rated a normal degree of light-fastness, 12 colors rated a high degree of light-fastness and only one, the colour “Opera” rated low. Personally l thought for the price to quality ratio this brand was superb. When l shopped for a set, the prices varied on Amazon and Ebay, but most were economical. I purchased a 30 colour paint set for $53.00 Canadian off Ebay and this price included free shipping. I have to forewarn you that it did take about 6 weeks for me to receive them, but l was in no rush so this didn’t bother me. When l opened my package the 7.5ml tubes were well placed and organized in a nice storage box, visually l was instantly awed by this product, and l was dazzled by the bright colour selection. I noticed when l started to lay down the watercolours just how vibrant and intense they were, this impressed me as l didn’t need much paint on the palette when l diluted the paint with lots of water to get the consistency l needed. They blended beautifully so employing the wet-on-wet technique was fantastic with these paints. I also used a dry brushing technique which worked well, and l found that the colours were very opaque, but easy to lift when desired. I also liked that you can purchase the tubes in open stock, but to be honest, it makes more sense to purchase a set if you run out of colours, given how economical they are. 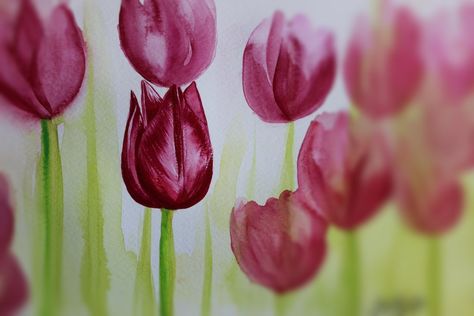
|
Author
I am hoping that l can be inspirational and informative. I feel that paying it forward is a great way to live. Archives
May 2023
Categories |


 RSS Feed